 Save
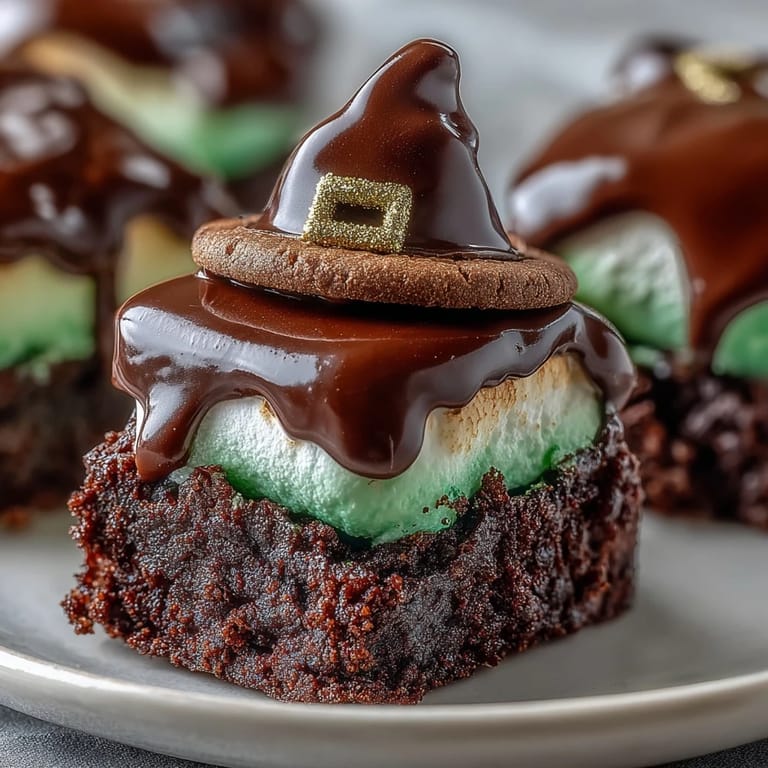
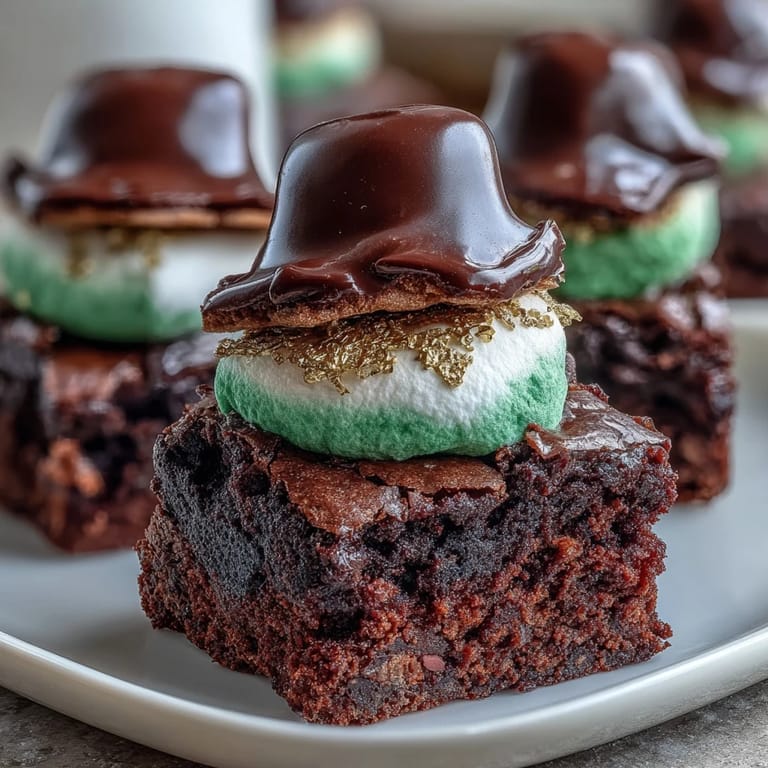
Save My neighbor knocked on my door mid-March with that mischievous grin that usually meant trouble, holding up a magazine with leprechaun hats made of chocolate. She challenged me to recreate them before St. Patrick's Day, and honestly, I thought she'd lost it—until I tasted the fudgy brownie base paired with that marshmallow crown. What started as a silly dare became our kitchen tradition, the kind where tiny mistakes somehow made them taste better.
Last year my daughter insisted on making these for her class party, and watching her pipe green icing bands while her friend steadied the marshmallows reminded me that the best recipes aren't about perfection—they're about the sticky fingers and laughter happening around your kitchen counter. She came home that day with an empty plate and a story about how everyone wanted the recipe.
Ingredients
- Unsalted butter (melted): The foundation of fudgy texture; melted first means the brownie bites stay tender instead of cakey.
- Granulated sugar: It dissolves into the batter and creates that signature brownie crumb, not too dense.
- Large eggs: Room temperature eggs mix smoother and bind everything without creating a rubbery texture.
- Vanilla extract: One teaspoon deepens the chocolate flavor without tasting vanilla-forward.
- Unsweetened cocoa powder: Don't skimp here; sift it to avoid bitter clumps that ruin the bite.
- All-purpose flour: The small amount keeps these delicate, almost brownie-truffle territory.
- Salt and baking powder: A pinch of each lifts the chocolate flavor and ensures they rise slightly in the pan.
- Large marshmallows: The crown jewel; choose fresh ones or they'll shred when dipped.
- Dark or semisweet chocolate chips: Melted with butter for that silky coating; dark gives sophisticated bite, semisweet feels nostalgic.
- Thin chocolate wafer cookies: The hat brim; thinner ones bend slightly when you press the marshmallow down.
- Green icing: Homemade tastes fresher, but store-bought saves sanity on party day.
- Gold sprinkles or edible glitter: The buckle that makes them unmistakably leprechaun-themed.
Tired of Takeout? 🥡
Get 10 meals you can make faster than delivery arrives. Seriously.
One email. No spam. Unsubscribe anytime.
Instructions
- Heat the oven and prepare your pan:
- Set it to 350°F and line a mini muffin pan with liners or grease it well—I learned the hard way that even non-stick pans betray you with something this rich.
- Make the brownie batter:
- Whisk melted butter and sugar until the mixture looks like wet sand, then add eggs and vanilla, stirring until the color lightens slightly. This aeration step makes a difference you'll taste.
- Fold in the dry ingredients:
- Sift the cocoa, flour, salt, and baking powder directly into the bowl to avoid lumps that would catch between your teeth. Stir just until combined; overmixing makes them tough.
- Fill and bake:
- Spoon batter into each cup about two-thirds full, filling each one as evenly as you can. Bake 12 to 15 minutes until a toothpick comes out with a few moist crumbs clinging to it.
- Cool completely:
- This patience step matters; warm brownies will crumble when you remove them. Let them sit in the pan until they're completely cool to the touch.
- Melt the chocolate coating:
- Combine chocolate chips and butter in a microwave-safe bowl and heat in 30-second bursts, stirring between each one so the chocolate stays silky instead of seizing. The texture should look like glossy paint.
- Dip the marshmallows:
- Insert a toothpick into the flat bottom of each marshmallow, dip it into the chocolate in one smooth motion, then twist gently as you lift it out. The excess chocolate will drip off in ribbons.
- Build the hat base:
- Place each chocolate-dipped marshmallow on a cookie while the chocolate is still set enough to grip. You want it firm but not hardened, so you have maybe a minute to work.
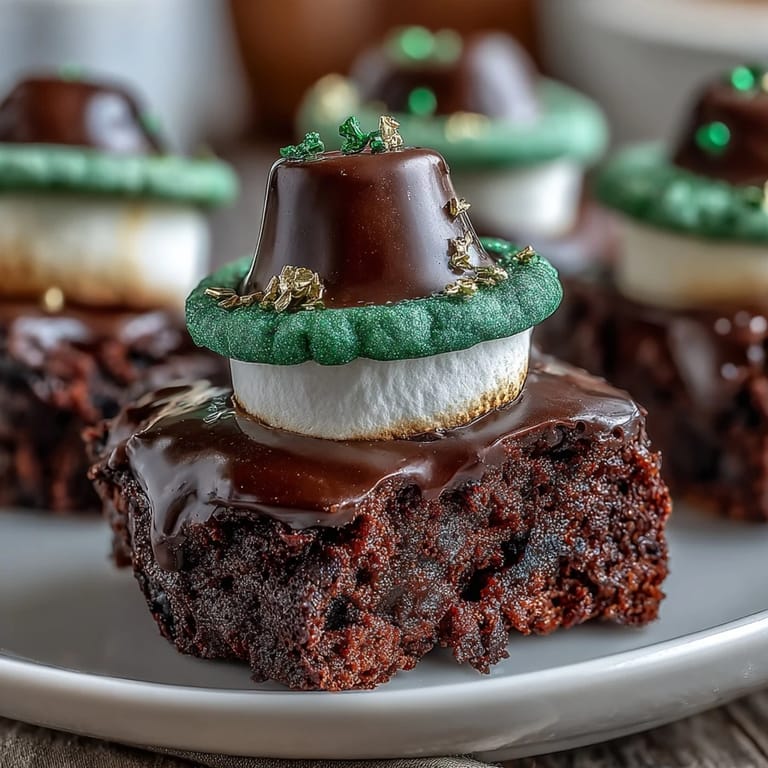
- Add the green band:
- Pipe or spread a thin band of green icing around where the marshmallow meets the cookie, then top with a sprinkle of gold for that buckle moment. This is where your leprechaun hat actually becomes recognizable.
- Crown each brownie:
- Remove the brownie bites from the pan, then gently press the marshmallow hat onto each one and carefully slide out the toothpick. They'll grip together naturally from all the chocolate and icing.
 Save
Save There's something magical about watching someone bite into one of these and pause, confused for a moment because they weren't expecting a fudgy brownie under that whimsical hat. That moment of surprise is worth every sprinkle of green icing.
Why Mini Muffin Pans Matter
The whole magic of these happens because of the size—a regular cupcake would be too much brownie against the marshmallow ratio, and the mini pan gives you that perfect tender crumb because smaller batches bake faster and stay moist. I once tried to stretch the recipe into regular cupcakes and they became dense, almost gummy, because they baked too long trying to cook through.
Chocolate Coating Secrets
The butter mixed with chocolate chips creates a coating that sets firm but doesn't shatter when you bite it; pure melted chocolate alone will be snappy and prone to breaking off. Temperature matters too—dip your marshmallows when the chocolate is still warm enough to flow smoothly but cool enough that it doesn't melt the marshmallow itself.
Storage and Make-Ahead Magic
These hold up beautifully for three days in an airtight container, and honestly, they taste slightly better the next day after the flavors have settled together. The icing firms up and the chocolate coating becomes more structured, which sounds fussy but really just means less mess when you bite into them.
- You can bake the brownie bites two days ahead and assemble them the morning of your party.
- Keep the finished hats in the fridge if your house is warm, as the marshmallow can soften.
- Gluten-free friends won't know the difference if you swap in quality gluten-free flour and wafer cookies.
 Save
Save These little hats are the kind of recipe that feels fussy until you make them once, then you wonder why you were ever nervous. Make them, celebrate whatever you're celebrating, and let the chocolate and green icing do their work.
Common Questions
- → What type of cocoa powder is best for fudgy brownies?
Using unsweetened cocoa powder enhances the rich chocolate flavor and keeps the brownies fudgy and moist.
- → Can I use dark chocolate instead of semisweet for dipping marshmallows?
Yes, dark chocolate works well and adds a deeper chocolate flavor, balancing the sweetness of the marshmallows.
- → How should I store the brownie bites to keep them fresh?
Store the assembled brownie bites in an airtight container at room temperature for up to three days to maintain texture and flavor.
- → Is there a way to make this dessert gluten-free?
Replace the all-purpose flour and chocolate wafer cookies with gluten-free alternatives to adapt this dessert for gluten sensitivity.
- → What’s the best way to apply the green icing neatly?
Use a piping bag or a small zip-top bag with a small corner cut to pipe a clean, even band of green icing around the marshmallow base.
- → Can these brownie bites be prepared in advance?
Yes, you can bake the brownie bases and prepare the decorations ahead, assembling just before serving to keep the marshmallows fresh.