 Save
Save The first time I decided to turn brownies into playful flowerpot desserts, the idea landed on a rare sunny May afternoon with the windows wide open and a trail of chocolate fingerprints across my countertop. The kitchen hummed with the sound of mixing, and I couldn't help but laugh at how grown-ups seem as giddy as kids when presented with anything whimsical. I'd seen versions of "dirt cake" as a child, but dressing brownies up in mini pots, adorned with edible flowers, felt surprisingly joyful—especially for Mother's Day. No one expects dessert to show up disguised as a garden centerpiece. The best part is watching faces light up, then seeing those first spoonfuls dig into what looks like soil, revealing the fudgy treasure beneath.
One year, my youngest niece insisted on helping with every step—even washing the flower pots, her tiny hands nearly disappearing inside. We ended up spilling half the Oreo "dirt" onto the floor and decorating one pot entirely with gummy worms by her choice, which had everyone at the table smiling. As we assembled each layer, she proudly announced she was making "real flowers for Momma." That little burst of pride (and chocolate smears) made the cleanup more than worth it. Sometimes the best recipes bring out the kid in all of us.
Ingredients
- Unsalted butter: Creates a rich, moist base for the brownies; melting it gives the batter an extra smooth texture.
- Granulated sugar: Not only sweetens but ensures that soft, chewy crumb everyone loves in brownies.
- Eggs: Trust me, adding them one at a time makes for a denser, fudgier bite—resist the urge to rush.
- All-purpose flour: Using just the right amount keeps these brownies from turning cakey, especially important since we want to layer them in the pots.
- Unsweetened cocoa powder: Choose a dark cocoa if you want an extra intense "soil" color and a bolder chocolate flavor.
- Baking powder: Just a little helps lift the batter so it remains soft instead of dense at the bottom of the pot.
- Salt: Even a pinch is essential—it sharpens all the other flavors.
- Vanilla extract: A splash adds warmth and rounds out the chocolate.
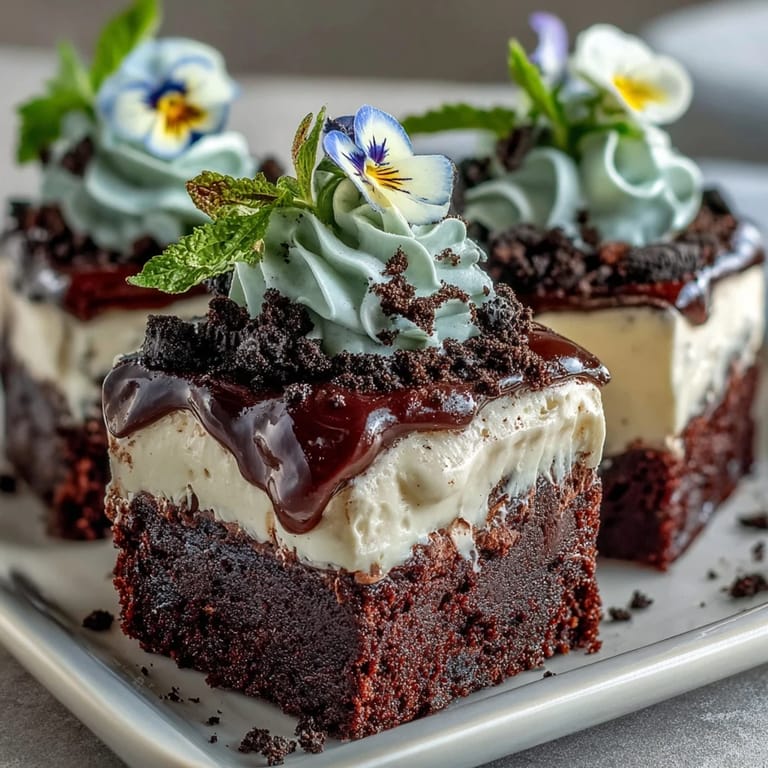
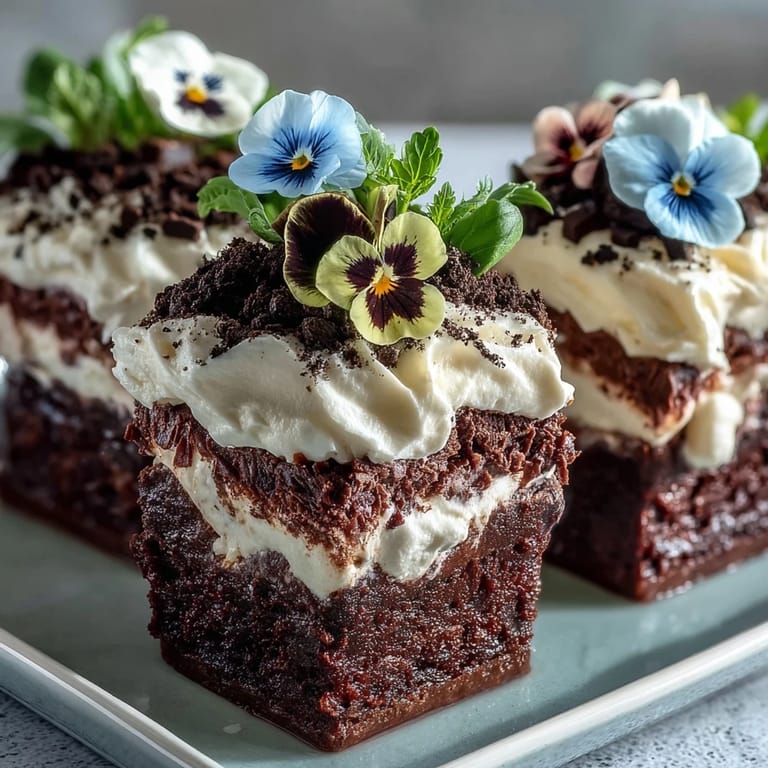
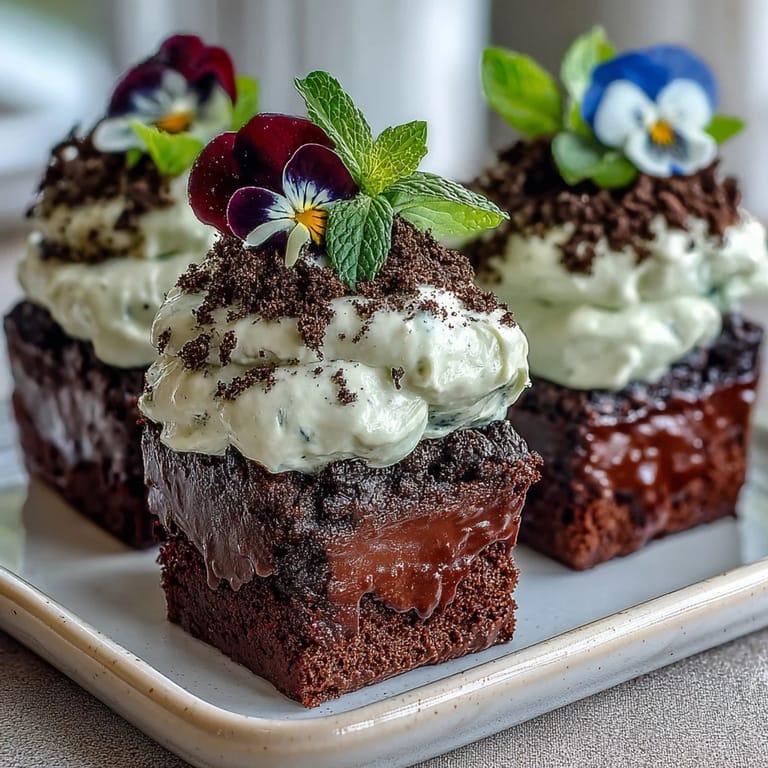
- Oreo cookies: The secret behind convincingly crumbly "dirt"; leaving the filling in makes for a better texture.
- Heavy cream: Whipping it yourself creates the freshest, most luxurious topping; don't skip chilling the bowl first.
- Powdered sugar: Melts perfectly into the cream, adding sweetness without any grain.
- Edible flowers (or colorful gummies): Brighten the whole dessert—always double-check they're safe to eat.
- Fresh mint leaves (optional): A fresh pop of green that tricks the eye and adds a gentle herbaceous note if you want it.
Tired of Takeout? 🥡
Get 10 meals you can make faster than delivery arrives. Seriously.
One email. No spam. Unsubscribe anytime.
Instructions
- Get your pots ready:
- Preheat your oven to 175°C 350°F. If you have oven-safe mini flower pots line the bottoms with parchment; otherwise use a baking pan and prep it with parchment for easy brownie removal.
- Melt & mix:
- Let the butter melt gently in a saucepan—it should smell nutty but never browned. Once off the heat whisk in sugar and vanilla so the mixture looks glossy and thick.
- Egg time:
- Crack in eggs one at a time whisking just until they disappear; the batter gets almost velvet-smooth at this point.
- Combine dry ingredients:
- Sift flour cocoa baking powder and salt directly onto the wet ingredients and fold together just until you no longer see white streaks—don't overmix or you'll lose that fudgy texture.
- Fill the pots:
- Spoon the brownie batter into your prepared pots or spread it evenly in the pan. If using flower pots fill about halfway for perfect layering later.
- Bake:
- Bake for 20 to 25 minutes; a toothpick should come out with moist crumbs when they're done. Let them cool in their containers completely so they set up nicely.
- Oreo dirt creation:
- Crush Oreos (with the filling intact) in a food processor or pound them in a zip bag with a rolling pin—it should look like rich black soil.
- Whip the cream:
- Beat heavy cream and powdered sugar until you get stiff peaks; it's ready when you can turn the bowl and nothing moves.
- Pot assembly:
- If you baked in a tray cut pieces to fit at the bottom of each pot. For those baked directly in pots just leave them as they are.
- Layer & sprinkle:
- Add a generous layer of whipped cream onto each brownie then top with Oreo "dirt" till fully covered.
- Decorate your garden:
- Pop on edible flowers gummies and mint leaves so each pot looks like a mini garden. Have fun arranging—no two pots will ever look the same.
- Chill & serve:
- Refrigerate until ready to present; serve straight from the fridge for best textures and color.
 Save
Save  Save
Save At last year’s brunch, Mom went quiet after her first spoonful, then announced she’d never seen a dessert “so stubbornly adorable”—which of course had us all laughing harder than we had all week. The brownies became a centerpiece, and long after the plates were empty, everyone lingered around the table as if hoping the flower pots might bloom again.
How to Make the Oreo Dirt Extra Convincing
Smashing Oreos with a rolling pin feels like a stress-relieving ritual, and the key is to leave a mix of fine dust and a few bigger craggy bits for “soil” that looks surprisingly real. Sometimes I hide a couple of mini chocolate chips under the Oreo crumbs, like little seeds waiting to sprout when someone digs in.
Tips for Choosing Edible Flowers
Some grocers swear edible flowers will taste like nothing, but I’ve found that fresh violet petals or pansies add a gentle hint of floral sweetness, especially if you tuck them onto the cream while it’s still cool. Always double-check: they must be labeled as food-safe—not all pretty petals are meant for dessert.
What to Do If You Don’t Have Flower Pots
Not everyone has a set of tiny terra-cotta pots at the ready; I’ve used small glass ramekins and even clear plastic cups in a pinch for the same edible garden vibe. Just layer brownies, whipped cream, and “dirt” as usual—the real trick is in the decorations, so don’t hold back on the flowers or candies.
- Try dabbing a damp paper towel to clean the rim before serving for picture-perfect pots.
- If prepping ahead save the edible decorations for just before serving to keep them bright.
- No matter your vessel be generous with the Oreo topping and flowers—the more whimsical the better.
 Save
Save  Save
Save However you serve these, they'll add instant cheer to your table—just be ready for plenty of smiles and maybe a couple of chocolate-streaked fingers. Here’s to desserts that double as conversation starters.
Common Questions
- → Can I use regular ramekins or muffin tins instead of flower pots?
Yes. Oven-safe ramekins or muffin tins work well; line bottoms with parchment if needed. If baking on a tray, cut cooled squares to fit into your chosen vessels for the same presentation.
- → How do I get the Oreo dirt extra fine?
Pulse Oreos in a food processor until uniformly crumbed. If you don't have one, place cookies in a sealed bag and crush with a rolling pin, then sift or press larger pieces through a fine-mesh sieve.
- → How can I ensure the brownies are moist but set?
Bake until a toothpick comes out with moist crumbs but not wet batter; pull them from the oven as soon as they reach that stage. Allow full cooling to set the crumb before adding cream and crumbs.
- → Are edible flowers safe to use?
Only use flowers labeled as food-safe from reputable suppliers or farmers' markets. Avoid flowers treated with pesticides and rinse gently before placing them on the finished treats.
- → Can these be made ahead and stored?
Assemble up to a day ahead and keep refrigerated in a covered container. Add delicate fresh flowers just before serving to preserve their look and texture.
- → Any common substitutions for dairy or egg allergies?
For dairy-free options, use nondairy cream and butter substitutes; for eggs, try a commercial egg replacer or a firm vegan brownie mix designed for egg-free baking. Texture may vary slightly.