 Save
Save There's something about the smell of peanut butter warming on the stove that stops me mid-afternoon. One Tuesday, I was standing in my kitchen watching honey swirl into creamy butter, thinking I needed something to grab before running out the door, and these bars were born. No oven required, no fancy skills—just a pan, a few minutes of stirring, and patience while they set in the fridge. They've become my answer to that moment when hunger hits and you have nothing but good intentions.
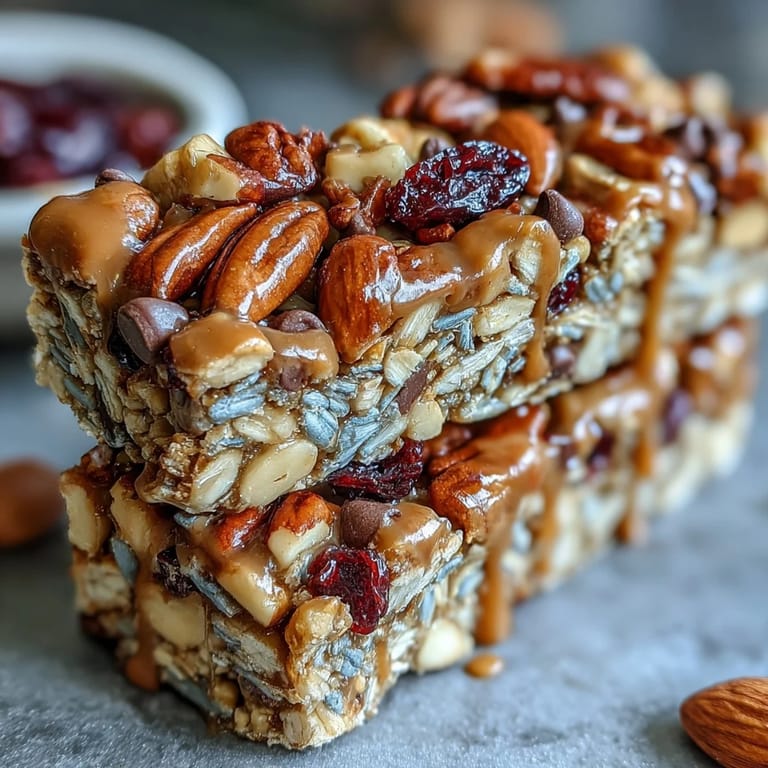
I made these for a hiking trip last spring, pressing them into a pan while my daughter watched from the kitchen counter, asking if we could add more chocolate chips. By the time we hit the trail three hours later, she'd already convinced me these were better than store-bought versions. Somewhere around mile two, she handed me one from her backpack, and I realized how perfectly they held together—chewy but not sticky, substantial enough to actually fuel you. That's when I knew I'd stumbled onto something keeper-worthy.
Ingredients
- Old-fashioned rolled oats (2 cups): Use the thick-cut kind, not instant—they give these bars real texture and keep them from turning into paste.
- Crisp rice cereal (1 cup): This adds a surprising lightness and keeps everything from being too dense; don't skip it thinking oats are enough.
- Mixed nuts (1/2 cup, chopped): Toast them lightly beforehand if you want deeper flavor, though raw works just fine when you're in a hurry.
- Dried fruit (1/2 cup): Cranberries, raisins, and chopped apricots all work beautifully—pick what sounds good or mix them together.
- Unsweetened shredded coconut (1/4 cup, optional): This adds a subtle flavor and chew; leave it out if coconut isn't your thing.
- Salt (1/4 teaspoon): This tiny amount makes the sweetness land properly and rounds out all the flavors.
- Honey or maple syrup (1/2 cup): Either one works; honey gives a classic sweetness while maple adds earthiness.
- Peanut or almond butter (1/3 cup): Make sure it's creamy so it mixes smoothly—chunky butter can make things gritty.
- Vanilla extract (1 teaspoon): Don't use imitation if you can help it; real vanilla makes the whole batch taste more refined.
- Mini chocolate chips (1/4 cup, optional): Add them after the warm mixture cools slightly so they don't turn into melted streaks.
- Chia or flaxseeds (1 tablespoon, optional): These add nutrition and a subtle nuttiness if you want to bump up the health factor.
Tired of Takeout? 🥡
Get 10 meals you can make faster than delivery arrives. Seriously.
One email. No spam. Unsubscribe anytime.
Instructions
- Line your pan like you mean it:
- Use an 8-inch square baking pan and line it with parchment paper, letting the edges hang over the sides so you can lift the whole batch out later. This sounds fussy but saves you from wrestling with bars stuck to the bottom.
- Combine all the dry stuff:
- Mix oats, rice cereal, nuts, dried fruit, coconut if using, and salt in a large bowl. Stir it together so everything is evenly distributed—no clumps of cereal hiding in one corner.
- Warm the sweet binding:
- In a small saucepan over low heat, combine honey and peanut butter, stirring constantly until they melt together into a smooth, pourable mixture, about 2 to 3 minutes. Low heat is key here; high heat will make the honey scorch and taste bitter.
- Add the warmth:
- Remove the pan from heat and stir in vanilla extract, then pour this warm mixture over your dry ingredients. Mix thoroughly until everything is coated and looks cohesive—no dry pockets of oats hiding underneath.
- Handle the chocolate wisely:
- If you're using chocolate chips, let the mixture cool for a couple of minutes before stirring them in so they don't completely melt and disappear. You want little pockets of chocolate, not a brown swirl.
- Press it into the pan:
- Transfer the mixture to your parchment-lined pan and press it firmly and evenly using a spatula or the back of a measuring cup. Press harder than feels natural—loose bars fall apart, solid ones hold together beautifully.
- Top it off if you like:
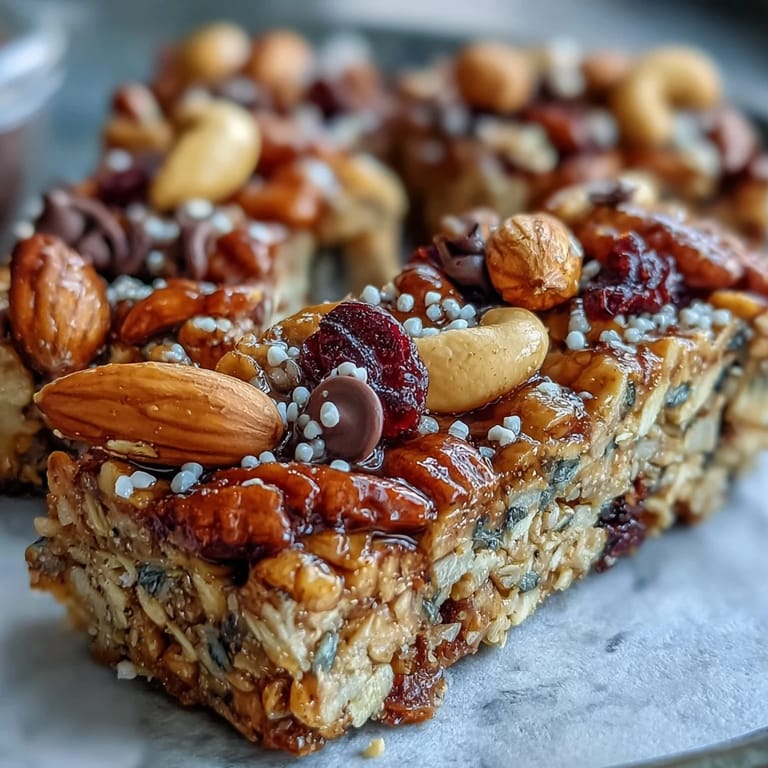
- Sprinkle extra chocolate chips, nuts, or seeds on top and press them gently into the surface so they stay put. This step is purely cosmetic but makes them look intentional.
- Chill and set:
- Refrigerate for at least 1 hour until the bars are firm enough to cut cleanly. I sometimes leave mine overnight if I'm not in a rush; they only get better as they set.
- Cut and store:
- Use the parchment overhang to lift the entire batch out, then cut into 12 bars with a sharp knife, wiping the blade between cuts if it gets sticky. Store in an airtight container in the fridge for up to a week, though they rarely last that long.
 Save
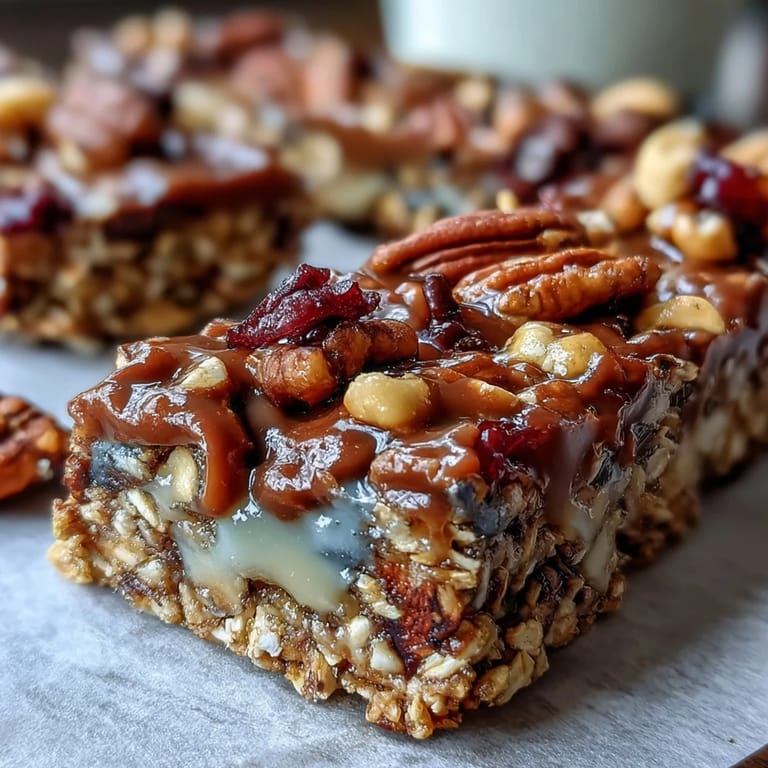
Save There's a moment right after you pull these from the fridge and cut that first bar where you realize you've made something that tastes expensive and deliberate, even though you weren't trying. My son once bit into one and said it tasted like someone actually cared about snack time, and I think that's the whole point.
Why These Bars Beat the Packaged Version
Store-bought bars often feel like they're held together by air and false promises, falling apart the moment you unwrap them. These ones are substantial and chewy, with real texture from the oats and rice cereal, and you can actually taste the individual ingredients instead of mystery binders. The peanut butter and honey do the work of holding everything together naturally, so there's nothing weird lurking in the ingredient list.
When You Don't Have What the Recipe Calls For
This is one of those recipes that actually celebrates substitutions instead of punishing you for them. If you don't have peanut butter, sunflower seed butter works perfectly and tastes almost the same, making these nut-free if you also skip the mixed nuts and use sunflower seeds instead. Almond butter, tahini, or even sunflower seed butter all work beautifully, and dried fruit is endlessly swappable—use whatever you have or love, from apricots to dates to blueberries.
Making Them Your Own
Once you've made them plain, the real fun starts. I've added cinnamon and cardamom for warmth, a pinch of sea salt on top for contrast, even a sprinkle of espresso powder that sounds weird but makes the chocolate taste incredible. For vegan versions, swap honey for maple syrup and use dairy-free chocolate chips, and the bars taste just as good, if not better. A friend added matcha powder last month, and honestly, she might be onto something.
- Chia seeds and flaxseeds add nutrition and a subtle earthiness without changing the flavor much.
- A splash of almond extract, just a quarter teaspoon, adds depth that guests always ask about.
- Pressing the toppings in firmly keeps them from falling off when you bite into a bar.
 Save
Save These bars have become my solution to the question of what to eat when life gets busy, and somehow they taste like I tried harder than I actually did. Keep a batch in the fridge and you'll stop reaching for the mediocre stuff.
Common Questions
- → What ingredients are used to bind the granola bars?
Honey (or maple syrup) combined with peanut butter or almond butter creates a smooth, sticky mixture that binds the dry ingredients together.
- → Can these bars be made nut-free?
Yes, replacing the peanut butter with sunflower seed butter and omitting mixed nuts makes a nut-free version.
- → How long should the bars chill to set properly?
Refrigerate the pressed mixture for at least 1 hour to ensure the bars solidify fully.
- → Are there any suggested add-ins to enhance flavor?
Optional add-ins include mini chocolate chips, chia seeds, flaxseed meal, or spices like cinnamon and cardamom for extra taste.
- → What is the best way to store these bars?
Store the bars in an airtight container in the refrigerator for up to one week for freshness.